How to make a quick, no knit mitten minder

Knitted baby mittens with purl texture and rib cuff and twisted cord mitten string
A DIY twisted cord mitten minder on the Broadstairs Dot Baby thumbless mittens

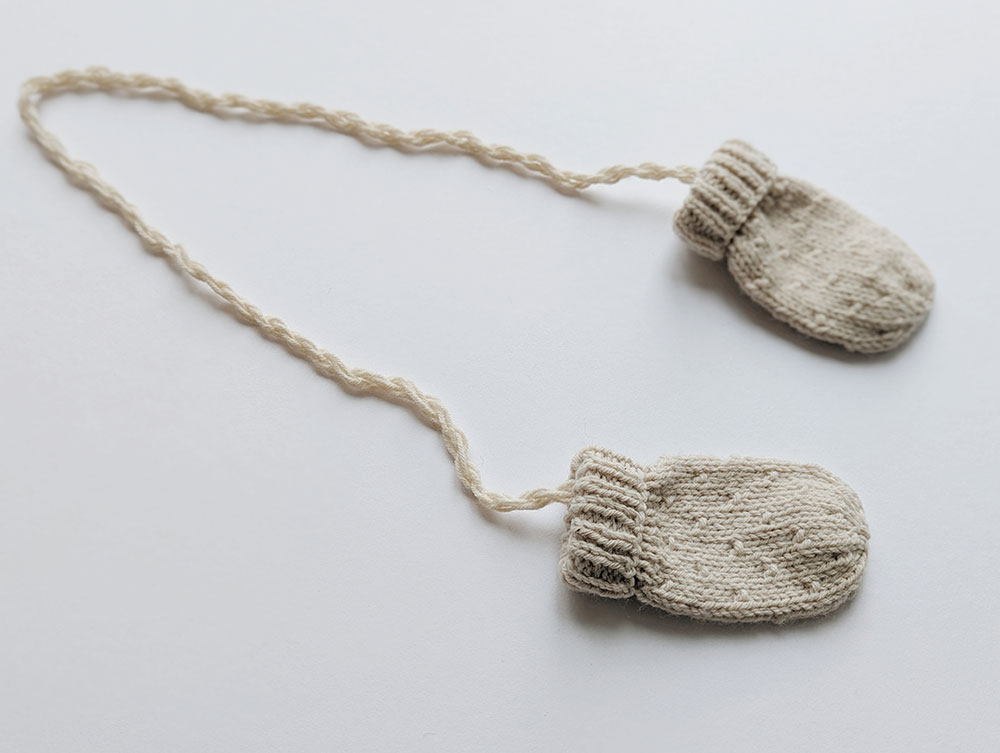
Let me show you how to make a quick, no knit mitten minder so the mittens you spent time knitting a baby will never go missing.

Typically, when you see a knitting pattern feature a cord or tie of some kind it often requires you to knit an i-cord. I love i-cords but they can take a bit of time to make. So this one is for all the time-poor parents and grandparents.

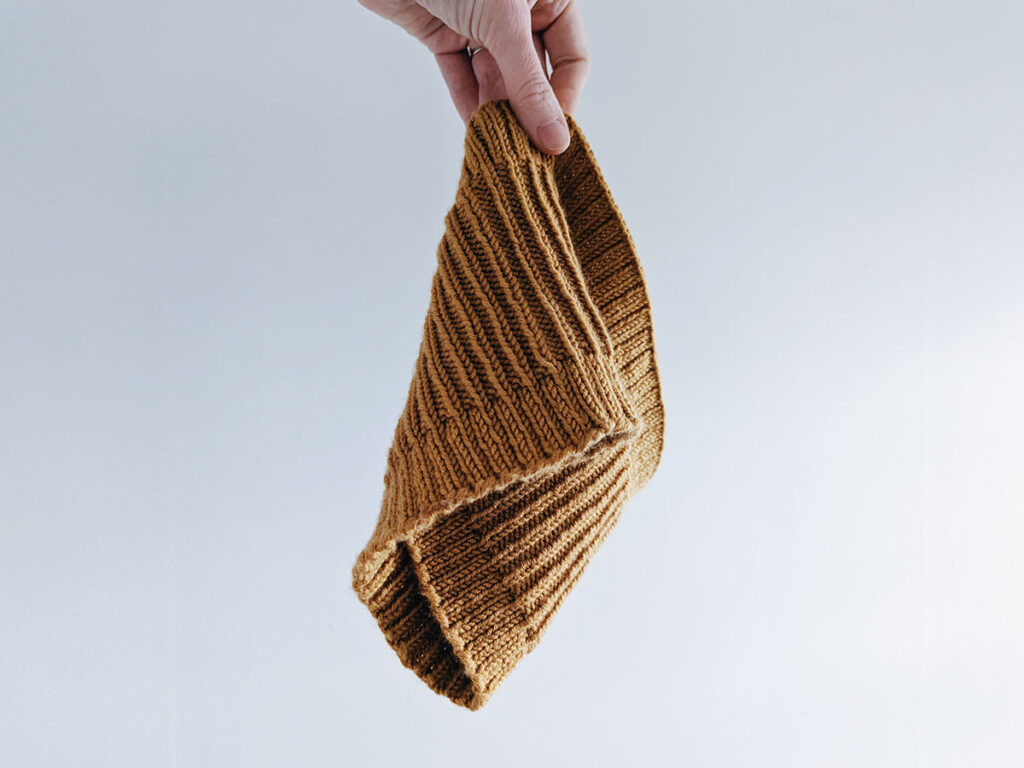
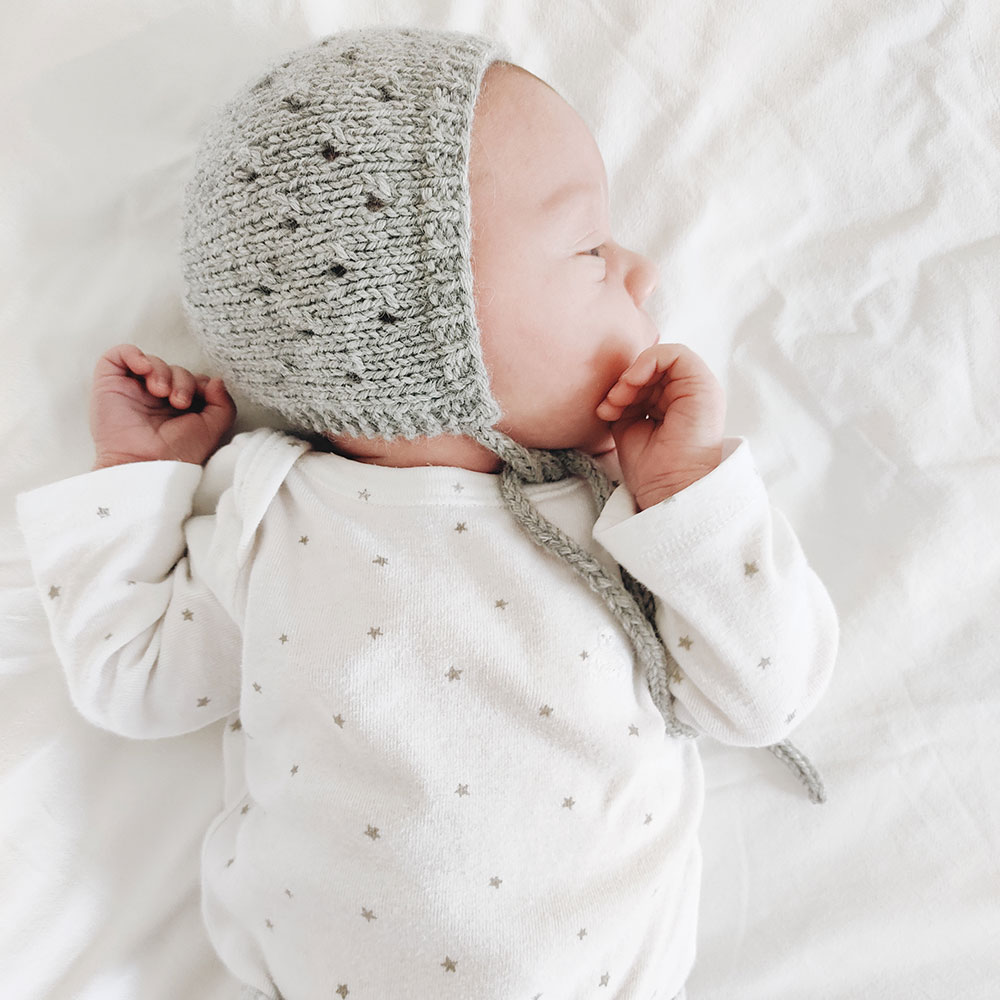
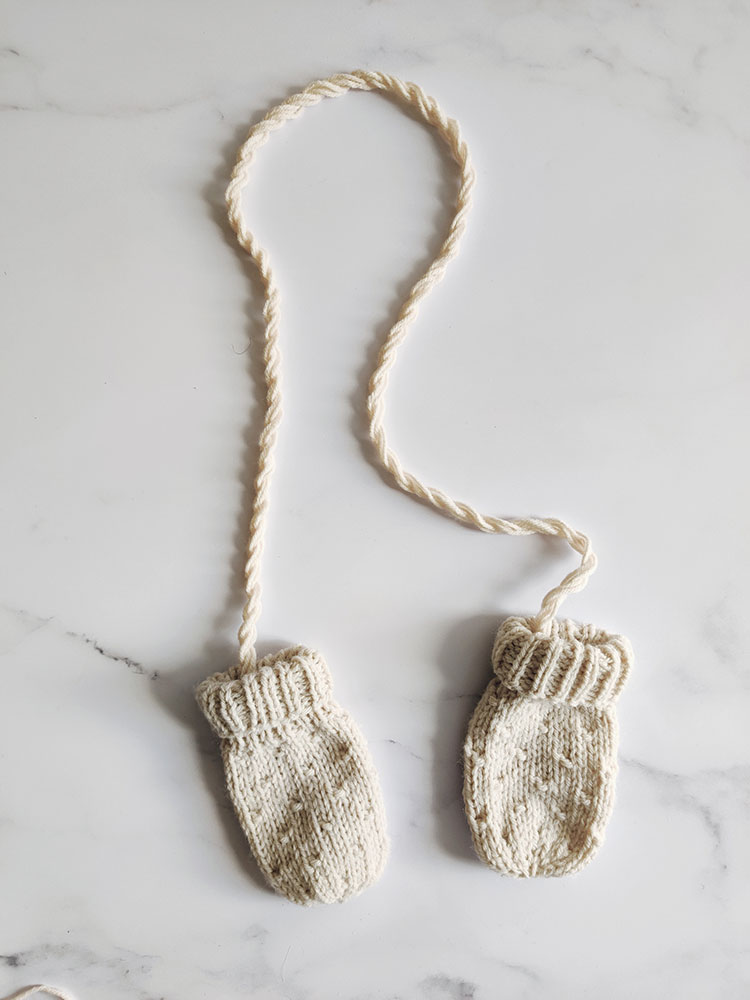
I’ve used the twisted cord here on my Broadstairs Dot mittens knitting pattern. If you’re after a super simple mittens pattern suitable for beginners, try my Confetti Baby Mittens knitting pattern. The twisted cord can be used on lots of other knitted items, including a bag strap or to replace an i-cord on a baby’s bonnet such as my Angus Baby Bonnet.

The Old Horizon knitted Dot Mittens with no knit mitten minder

Supplies for making a twisted cord

There’s no special tools required here. You will need:

How to make a twisted cord mitten minder

To make your no knit mitten minder, follow these super easy six steps. You can also watch each step in my quick tutorial video below.

Step 1: Start with three strands of yarn all – all of them should be the same length – about three times the length you want your mitten minder. Knot together the three strands at either end and then tie each end around a knitting needle.

Step 2: Place one of the knitting needles somewhere it will stay put. I like to place mine down the side of the sofa but you could also get someone to hold it for you.

Step 3: Twist the other knitting needle round and round so it starts to twist the yarn. Keep twisting until it is folding back on itself. You want the yarn to be very twisted until it feels like it can’t take any more twisting. The more twisting you do, the less loose and more secure your cord will be.

Step 4: Stretch out the cord as long as it will go, place your finger in the centre and fold the length of twisted yarn in half, letting it twist itself up.

Step 5: Tie a knot at both ends of the twisted length of yarn about 1 inch in from the ends. You can then trim both of the ends to neaten them up.

Step 6: Secure to the inside of your mittens.

How long should a mitten minder be?

To work out how long a mitten minder should be, I recommend measuring a coat or top of the person who the mitten minder is for. Measure from one cuff, across the chest and all the way across the other cuff. Then add an extra 10-15cm depending on how much you’d like them to hang.

If you can’t measure an item of the person’s clothing because you are gifting, then I suggest using the Craft Council’s size guides. They have a baby size guide and a children’s size guide. To work out the required length of a mitten minder, find the age you are making one for and add up the arm length to underarm measurement (x 2) plus the cross back measurement. This should give you your best chance of making an accurate mitten minder length.

And to finish off, a word on safety. At the end of the day, this is a cord and should be treated with care when in use. Ensure it is not twisted around a child when being worn. Make sure the cord is not too long and if it is, it is easy enough to tie a couple more knots further in from the ends and cut length off both ends.

This page contains affiliate links, which earn me a little bit of commission if you make a purchase, at no additional cost to you.

Free Children’s Snood Knitting Pattern

Ribbed children's knitted snood in mustard

Enjoy our free children’s snood knitting pattern for both boys and girls. It’s the perfect quick-knit snood pattern for the cold winter in the UK this year.

The big bonus of a snood instead of a scarf is kids can’t use it as a skipping rope or reins or whatever else their imagination may turn your hours of knitting into. This knitted snood will fit into their school bags easily without being bulky and annoying for them.

In my experience there aren’t that many snood patterns for toddlers and young children. So if you’ve ever wondered how to knit a snood for children then this is for you!

Free childrens snood knitting pattern - child wearing knitted rib cowl in mustard in size 4-6 years

Free kid’s cowl pattern: what you need to know

This kid’s cowl knit in the round. You can knit it on double pin needles (DPN) or a circular needle. If you knit with a circular needle you will likely have to use the magic loop method.

This is an easy cowl knitting pattern. It’s perfect for beginners who have learnt to knit in the round or are in their early days of learning this skill.

Skills you will need to know: casting on, binding off, knit stitch, purl stitch, joining in the round and working in the round, weaving in tail ends.

Please do not copy, sell or redistribute this pattern. If you wish to share this pattern, please link directly to post. You may sell items produced from using this pattern but may not use my photographs in your listing.

Sizes

1-3 years (4-6 years : 7-12 years)

Circumference: 40. 5 (44 : 48) cm

Height: 14 (16 : 18) cm

Yarn

Debbie Bliss Baby Cashmerino – photographed in Mustard

1 (2 : 2) balls
115m (143m : 175m) / 126 yds (157 yds : 192 yds)

Gauge

31 sts and 35 rows to 10cm / 4in in the k1, p2 pattern on 3.25mm needles

Needles

3.25mm needles – DPN or circular needle if using the magic loop method

Notions

Tapestry needle for weaving in the ends

Abbreviations

k – knit; p – purl; rnd(s) – round(s) sts – stitches

Free children’s snood knitting pattern

Cast on 126 (138 : 150) sts and join to work in the round being careful not to twist your sts.

Rnds 1 – 11: [K2, p1] repeat to end of rnd.

Rnd 12: [K1, p2] repeat to end of rnd.

Repeat rnd 12 24 (30 : 38) more times

Nxt rnd: [K2, p1] repeat to end of rnd.

Repeat the last rnd 10 more times.

Nxt rnd: Bind off.

Weave in your ends and block if required.

And there you have it! You child’s neck will never be cold again with our free child’s snood knitting pattern.

This page contains affiliate links, which earn me a little bit of commission if you make a purchase, at no additional cost to you.

If you make a snood using this pattern then share it with me on Instagram.

Find more of my patterns for babies and children here.

How to tie-dye knitwear

Blue and white tie-dyed hand knitted sweater by The Old Horizon

Have you ever wondered if you can tie-dye your knits or perhaps how to tie-dye your knitwear? Well you absolutely can and it’s really easy to do. Tie-dying a knitted sweater (or any other item of knitted clothing) is one of the easiest and quickest ways to make a simple knit into something fun and unique. Here’s my guide and top tips for tie-dying your knits.

Tie-dye supplies

You will need:

  • A knitted item of clothing. The knit will need to be made from a natural material such as wool (superwash wool can be tie-dyed), cotton or bamboo. My photographed sweater is made from Chester Wool Company Ultra DK. The pattern from my sweater is my Casper Sweater without any of the halloween decorations.
  • Tie-dye kit. I used the Kumber tie-dye kit from Amazon. Many kits come with items below so check before you buy more than you need.
  • Elastic bands
  • Plastic gloves
  • Plastic bag
  • Protective material for any work surfaces you are using such as plastic bags or sheeting

How to tie-dye your knitwear instructions

  1. Start by preparing your work area. You will want to have all the items to hand and make sure that surfaces are protected from getting any dye on them. I used a plastic bag.
  2. Make your knit damp. Many tie-dye kits will say that you don’t need to pre soak your clothing but with wool I found it’s best to. This will allow the dye to saturate the fabric easier. You don’t want your knit to be dripping wet.
  3. Tie up your knit with the elastic bands. The way you scrunch and secure your knit will impact the outcome of your dying. I wanted a random dye pattern across the sweater so I scrunched my knit up and secured tightly with the elastic bands. But you could create a spiral pattern, the traditional bullseye or sunburst patterns and even stripes. There are lots of tutorials on ways to fold and secure your clothing for tie dying like this video.
  4. Add water to the dyes following the kit’s instructions.
  5. Apply the dye!
  6. Once you’ve finished applying the dye to your knit, pop it in a plastic bag and leave for around 6-8 hours. Leaving the dye to soak in will give you nice vibrant colours.
  7. Take your knit out of the bag and remove all the elastic bands to reveal your finished tie-dye pattern.
  8. Rinse out the excess dye in cool water.
  9. Wash your project as per the washing instructions for your yarn. This could mean a handwash soak for any wool items.
  10. Block your project and let it dry.

Remember what makes tie-dying so much fun is just how unpredictable the end result is! I hope you have fun experimenting with tie-dying your knitwear.

Top tips for knitting for babies

Baby wearing grey Angus knitted bonnet with eyelet pattern
Angus baby bonnet

Are you planning a knitting project for a new baby boy or girl and looking for top tips on how to knit for babies? You might have lots of questions or heard lots of rules for what you should and shouldn’t do.

I’m here to bust the myths and give you the ultimate guide to knitting for babies. From yarn choices, the essential items to knit, what advice you can ignore and how to gift your knits: let’s dive in to all my top tips for knitting for babies.

What yarn should I use for baby knitting?

Let’s start with the biggest baby knitting myth of all. Many knitters and crocheters all over the world live by a rule that you must only make baby knits in acrylic yarn. But that is absolutely not true.

Sure, acrylic yarn is a reliable choice for many and we all love that it is machine washable. But that is absolutely no reason to ignore the likes of cotton, bamboo and (controversially) wool.

A very small number of babies may be allergic to the lanolin in wool but it really is a tiny group of babies and you shouldn’t right off wool completely because of this. Us humans have wrapped our babies up in wool for tens of thousands of years. It really is a super fibre due to being naturally flame resistant, super absorbant (great for all the dribble!), natural, biodegradable, breathable and the list goes on.

So no fibre is off limits for babies.

If you want to gift a new parent something they don’t have to hand wash then pay attention to the yarn label.

Otherwise, lightweight yarns made from cotton and bamboo are great for summer and acrylics and wools are excellent for winter.

What size should I knit for a baby?

The teeny tiny newborn knits are incredibly cute and quick to knit. But babies grow FAST so it’s best to only knit a couple of items for the early months of a babies life.

Then I always suggest knitting a size up. I can tell you from personal experience that if you knit something in the size they currently are then by the time you’ve finished it, they’ll be in the next size up. Sleeves and legs can always be rolled up.

Off white baby blanket with bobbles, eyelets and lattice pattern. Off white eyelet patterned baby cardigan and off white eyelet pattern baby bonnet
Angus baby layette set
Things to remember when you gift baby knits

Never forget to gift your knits with washing instructions. Even if the yarn you’ve used can be machine washed at 40 degrees, it is best to make sure no new parent is left guessing. Sure, it’s not glamorous but it will be super helpful.

Make sure your knit is ready to use. That means button are secure, the item is blocked and ends are weaved in.

And last, but not least, remember to tell the recipient what age range the knit if for.

What should I knit for a newborn baby?

There are no rules for what you can and can’t knit a baby. Here in the UK, hospitals recommend you pack a hat and blanket in your hospital bag. A nice knitted hat and blanket look so much better in photos than a shop bought hat and hospital blanket!

A cardigan that new parents can easily put on and take off a baby is great in the early days of figuring out how hot or cold your baby should be.

But no matter what you knit, a baby in hand knits is just the best and always an incredibly thoughtful gift.

Find all baby knitting patterns, from heirloom blankets to cosy cardigans, here.